Norse Subscriptions help
Get started with subscriptions
Go from a new install to subscription choices on your product page, one decision per screen.
Get started takes you from a new install to subscription choices on your product page, one decision per screen. You open it from Overview, where the card Set up subscriptions has a Get started button.
Before you start
- A payment provider that can charge a saved card again. Options like Vipps and Klarna usually can't. If Shopify says your store can't sell subscriptions yet, a notice at the top says so, with Open payment settings. The notice goes away by itself when Shopify says yes.
- Products in your catalog to sell on subscription.
Go through the steps
- On Overview, press Get started.
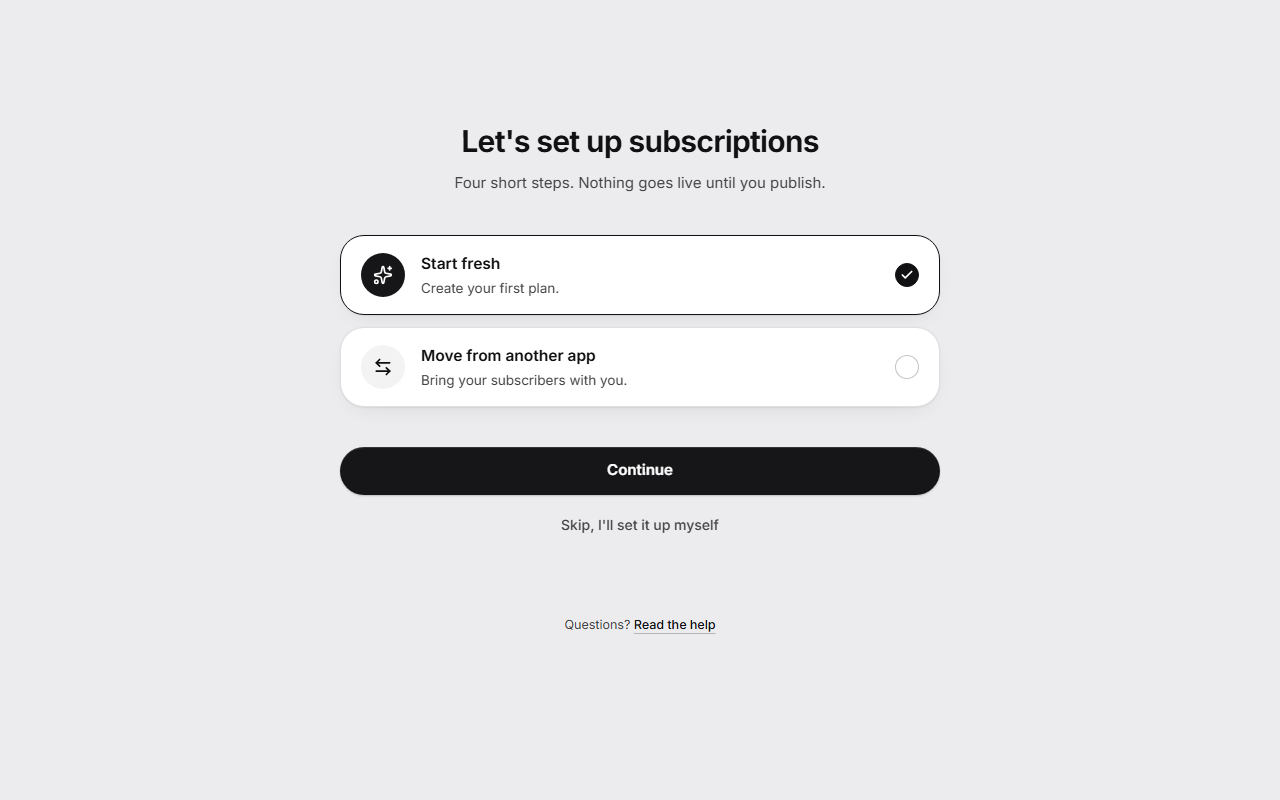
- Choose Start fresh and press Continue.
- On Choose what to sell, pick Chosen products, Collections or All products, and choose what to include. Press Continue.
- On Set the price and rhythm, choose the discount. Under How often, turn rhythms on or off, or press Add your own.
- Check the Plan name, and press Publish plan.
- On Show it on your product page, press Turn on in theme. Shopify opens your theme in a new tab with the subscription choices switched on.
- Press Save in the theme editor and come back. The step ticks itself off when Shopify sees the choices. Press Continue.
- On Turn on charging, press Turn on on the row Automatic charging, then press Finish.
You're ready then says in one line whether subscriptions show on your product page and whether charging is on. View your product page opens it.
If your subscribers are in another app, choose Move from another app in step 2. It takes you to Move subscribers. See Move from another app.
On the price step
- The discount starts at 10%. Percent off, Amount off and Fixed price change the kind of discount.
- On the step before, What do you sell? lets you tap what you sell. It only suggests which rhythms to offer here.
- Different discount per frequency gives each rhythm its own discount.
- More options holds Another price for the first orders, Paid up front, Minimum orders, Ends after (orders) and Renewal day.
- Beside the choices, What shoppers see shows your own product as customers will.
- Open the full plan editor is there for anything else. See Create a plan.
Leave and come back
Back and Skip setup are at the top of every step. What you chose is kept, so you can leave, open your theme or reload, and come back to the same step. The card on Overview then says Pick up where you left off, with Continue.
Use the setup list instead
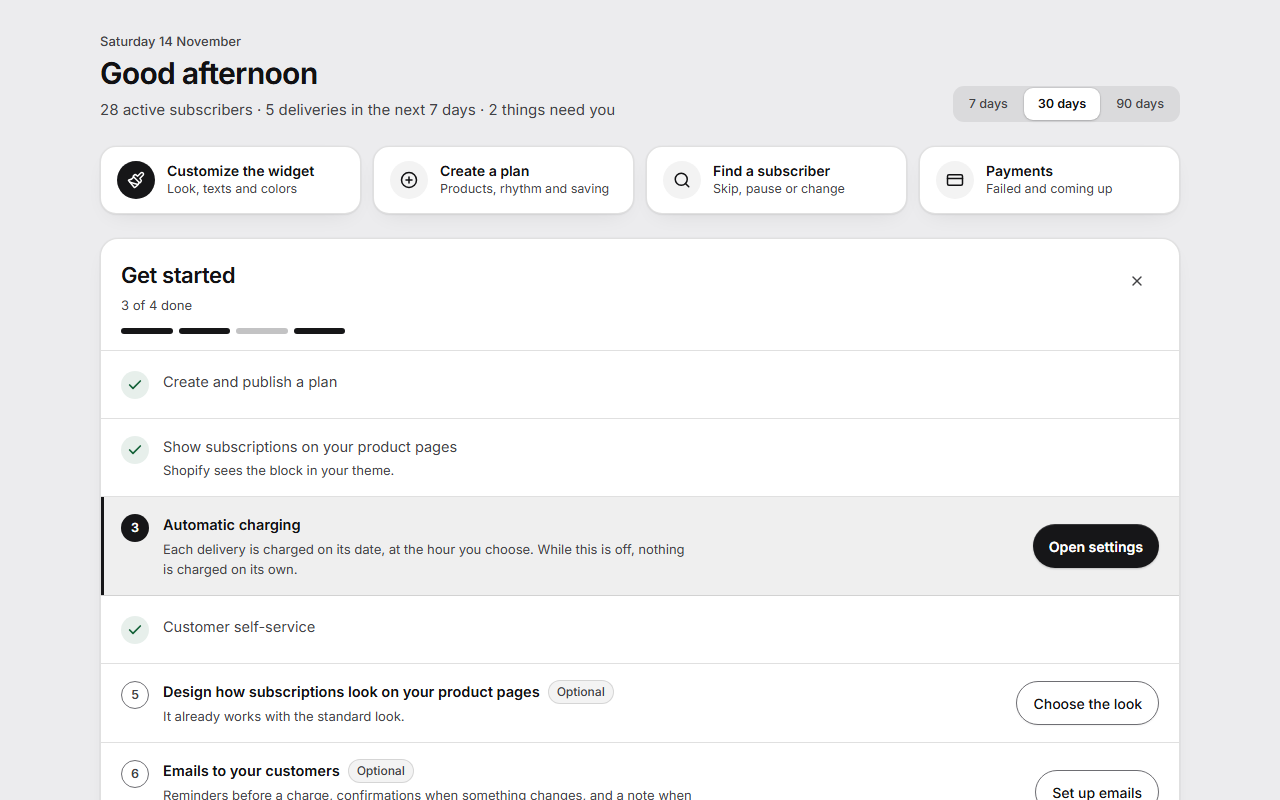
If you press I'll set it up myself on Overview, or skip Get started, Overview shows a setup list named Get started. Each row is one step with its own button:
- Create and publish a plan, with Use the template ("Subscribe and save 10%": three rhythms and 10% off) or Make your own
- Show subscriptions on your product pages
- Automatic charging
- Customer self-service
Rows marked Optional follow, such as the look of the widget and emails to your customers. The list counts how many of the four steps are done. Open Get started at the foot of the list takes you through the same steps one screen at a time.
Until setup is done, every page except Overview shows a line at the top, such as Setup 2 of 4, with Continue.
To close the list, press the cross in its corner. To bring it back, open Settings, open Advanced and press Show it again.
Good to know
- Nothing reaches your store before you press Publish plan, and nothing is charged before you turn on charging.
- Publishing a plan doesn't put the choices on your product page. The theme step does, and the choices then show above the buy buttons on every product with a plan.
- If your product page has no buy buttons block, the theme step offers Add to product page instead. Do this later moves on without it.
- If Shopify can't tell the app whether the choices are in your theme, the step lets you tick it off yourself with It's on, continue.
- If deliveries are already waiting to be charged, the button says Turn on… and a window first says what will be charged. See Automatic charging.
- Try a test order first, on the charging step, opens a short recipe for a test purchase.
- After setup, Overview suggests one next step at a time, such as shipping, upsells or emails. The cross on it (Not now, hide this) hides it for good.
- For the first 14 days after your store first installs the app, you have everything in Growth, whatever your plan. See Norse plans.